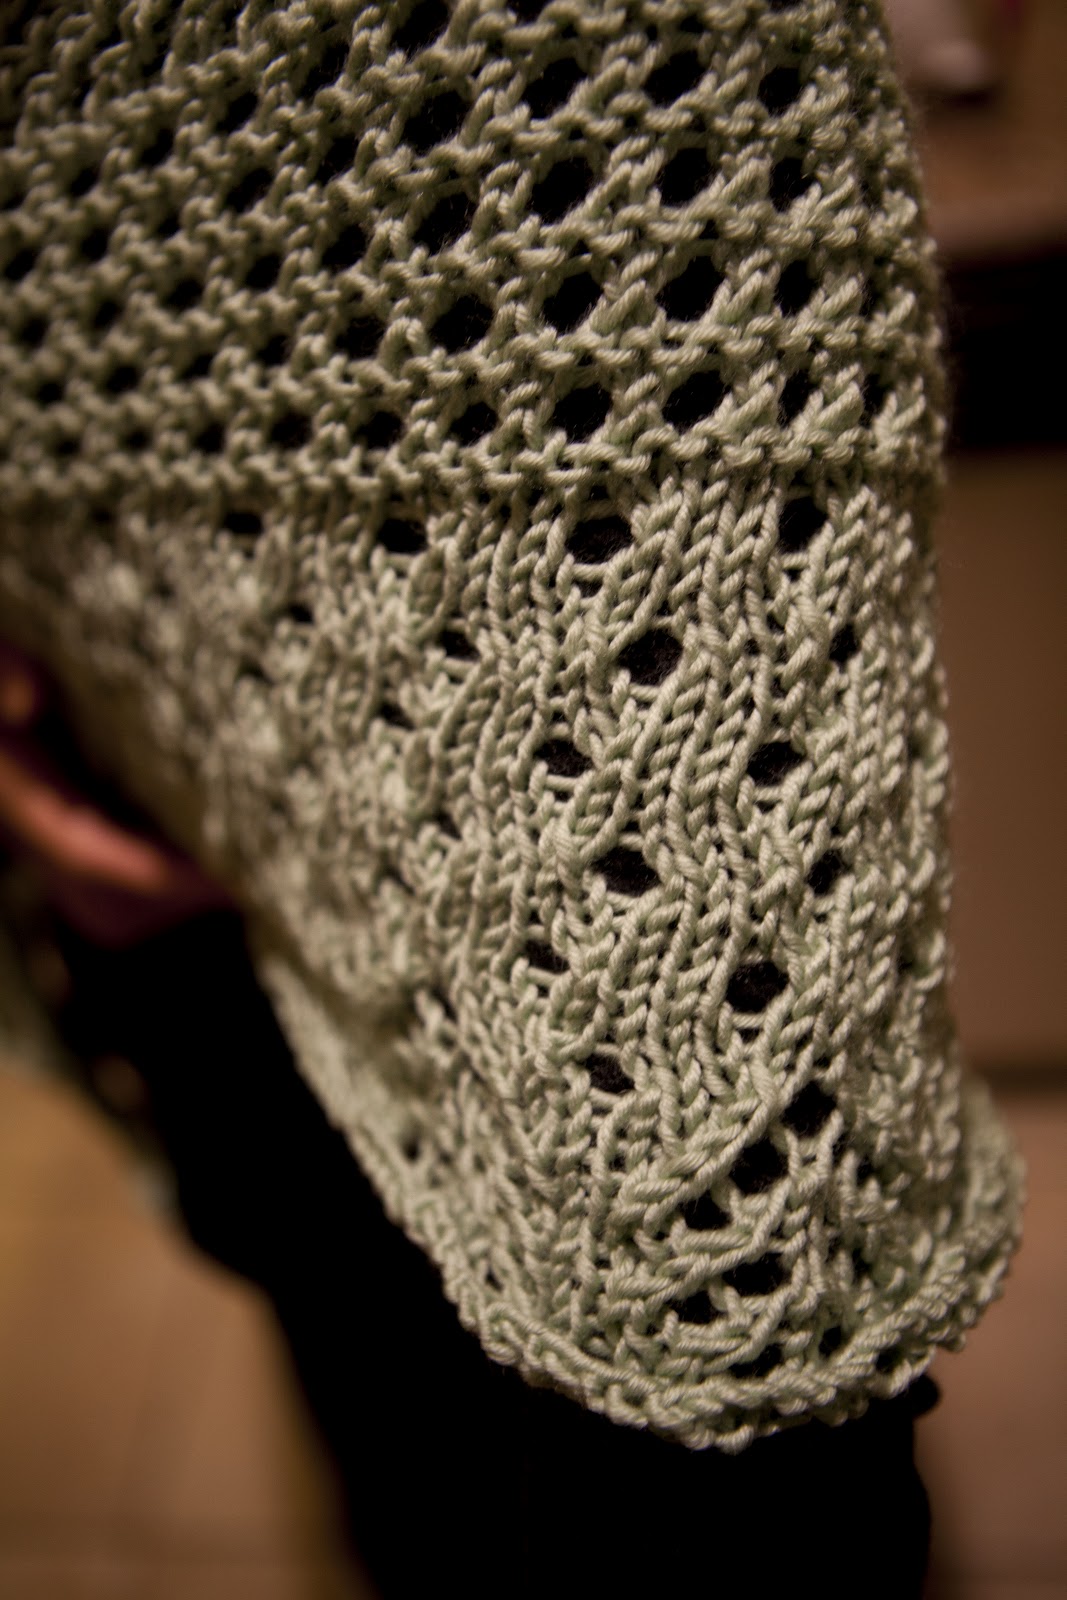
The lace triangle shawl designed by Helen Bingham is complete and I think it looks beautiful, thanks so a friend who showed me how to complete the crochet bind-off, which was nice and simple to do. There is an April KAL and it's so nice to take a peek and see the shawl in different yarns and hues. Here are some pre-blocking photos:
This shawl is great. It stays nice and put on the shoulders, even as I'm typing. It's warm, too, and I'm sure I'll wear this frequently. It looks better next to a tea cup than a sweatshirt! Here are some closeups:
Tuesday, April 10, 2012
Wednesday, March 7, 2012
Lace Triangle Shawl
I saw the Lace Triangle Shawl by Helen Bingham in the Spring/Summer 2012 Vogue Knitting magazine. The shawl is made from a worsted weight yarn, which makes for a faster knit. The pattern's suggested yarn was the Martha Stewart Extra Soft Wool Blend, which debuted last year. I was curious to try it, and picked up three skeins in Eucalyptus Green.

The yarn is soft and feels like bamboo yarn. (The yarn is a wool-acrylic blend.) Right now, the only colors available in the yarn are pastel. I cast on and worked through the mesh pattern.
So far, a good beginning.
Thursday, March 1, 2012
Garage Reveal
This is what our garage looked like before:
And after:
1. What space did you decide to organize and why?
The garage, because it was the junk drawer of items from other rooms. It was the go to place to dump everything before company came over because it was the room that no one lives in. However, when we needed gardening supplies or tools, there was no clear walkway and it was a potential health and safety hazard.
I started early and in small steps. I focused on one section at a time and this made me think about whether the objects I stored in a certain area was practical and easy to get to for the task at hand. I organized more frequently used items, like dog food, paper towels, and the vacuum right by the house door leading into the garage because I use those products more frequently. Usually, clearing up one section motivated me to clear up another section.
3. What was the hardest part of the challenge for you and how did you overcome it?
Getting started. I had purchased the two garden tool organizers over two years ago! Sometimes when there is more than one person utilizing the space, it's about coming to agreement on how the space will be used. I had to convince someone else that the organizers would work best on a particular wall. I started by organizing gardening items in baskets and placing them on top of the shelf. After that, everyone can visually see (and agree) that the garden tool organizer would go best underneath the shelf.
4. What did you do with the “stuff” you were able to purge out of your newly organized space?
I was able to donate most items. We also opened up a cardbox box and found a forgotten shelf! It was an organizing gift that was used in a different part of the garage.
5. Tell me one of your proudest moments during this challenge?
Wheeling the bike out of the garage without having to wheel several items out of the way first!
6. Explain any organizing “tools” you used to help you create additional space and to establish some limits and boundaries?
I used baskets to categorize products, two garage organizing tools to lift garage tools off the floor, and two garage shelves to take advantage of unused vertical space. This helped to create zones within the garage: gardening, holiday items, sports equipment, tools, etc. It's so nice to be able to find a parituclar item easily.
7. What is ONE piece of advice you’d give to someone else to encourage them on their organizational journey?
I love plastic containers and the labelmaker. This gives you more flexibility in case you want to move items around as your space changes. It's affordable, visible, and waterproof.
Friday, February 17, 2012
Garage Organization - Part 2
After organizing all the gardening supplies in the garage last week, I wanted more of this:
And less of this:
Why is there a mattress here when no one sleeps there? Good question. I wasn't planning on sleeping there! We moved this mattress upstairs to replace another. Since the garage shelving for the holiday decorations worked so well, we went to Costco to get another:
Each shelf holds 1,500 pounds. Wow. That can hold several of me on each shelf. What went on this shelf? All the stuff that couldn't fit on my pantry shelves.
It was great that all the food items were organized on the shelves, but it defeated the purpose if I couldn't get to them.
This is what the garage shelf looked like afterwards:
There are 5 shelves. From top to bottom, left to right:
- (not visible) sports equipment
- cleaning & food storage supplies
- beverages & emergency supplies
- vaccum attachments (in basket), Roomba vaccum, & extra bags
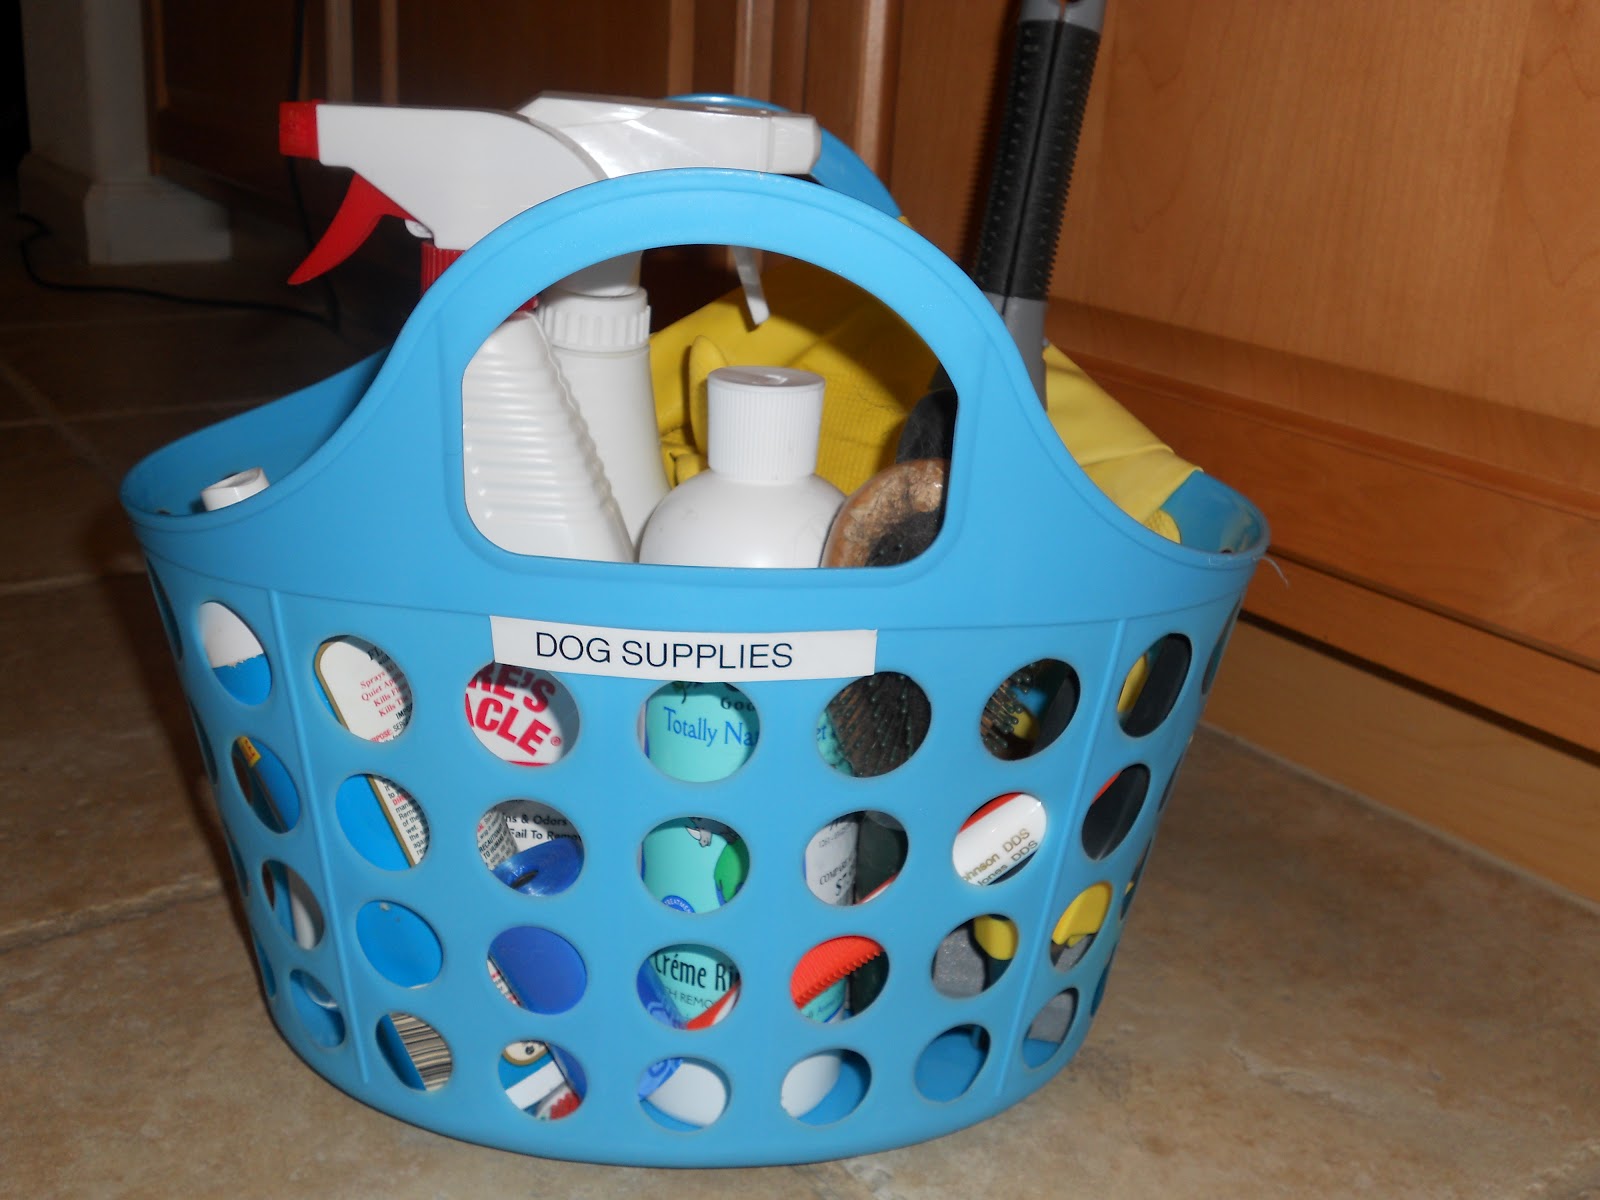
- dog food buckets, dog supplies, & car wash bucket
We were able to place the vaccum and carpet cleaner next to the shelf - they previously resided in the last room they were used (nice policy, right?), and we later added a donation box by the door to easily corral items we no longer need. When the donation box is full, we drop the donations off.
Now this is what the pantry (or the pantry floor) looks like:
The downside is that it's much easier to snack now!
In the past two weeks, I have spent $70 on garage shelving and $20 in baskets to organize the garage and pantry. It's been worth it!
Sunday, February 5, 2012
Garage Organization
Today, I rediscovered the garage floor! This is what happened:
This is what the garage looked like yesterday morning:
Sometimes you wish you could rewind back in time. This wasn't one of those times. Those wires remind me of how electricity is wired above ground in S.F. There's also a life vest hanging on the far wall. (Good thing it's not the fire extinguisher.) I was tired of tripping over items in the garage (they're not the most gentle on your toes) and it was a big pain getting the bikes out. The garage needed some organizational love.
I also tackled other items that were already organized in the garage, like the dog supplies:
This is what the garage looked like yesterday morning:
Sometimes you wish you could rewind back in time. This wasn't one of those times. Those wires remind me of how electricity is wired above ground in S.F. There's also a life vest hanging on the far wall. (Good thing it's not the fire extinguisher.) I was tired of tripping over items in the garage (they're not the most gentle on your toes) and it was a big pain getting the bikes out. The garage needed some organizational love.
Since most of the tools leaning against the wall were gardening tools, I figured we should just move all the gardening-related items there. I added five baskets to the shelf to sort the plant food, gardening supplies, weed control products, and insect repellents. I also moved my gardening carryall from the ground to the shelf. Jeff drilled two gardening organizers to the wall so we could hang all the gardening tools.
I also tackled other items that were already organized in the garage, like the dog supplies:
and made it better:
Usually, we take the dog shampoo and gloves outside to wash the dog and take our time putting the supplies back, but it just made more sense to add handles to easily carry everything. Besides, who wants to run back into the house to grab the dog's toothbrush when you're soakin' wet?
So, that's what happened to the garage in two hours. I can now get from one side of the garage to the other without having to open the garage door first.
Monday, October 10, 2011
Loft Pillows
Pillow fever continues! Sunday was a great time to nest the loft with two new additions to the couch.
| I love big, floral patterns. Especially against a solid background. |
| Isn't this fabric cute? |
| Cutting pillow squares from the folded selvage. |
| Marking out the squares (in faint blue tailor's chalk). |
| Pinning matching piping to the right side of the fabric. |
| Both sides sewn together, with an opening for the pillow form. |
| A happier couch. |
Sunday, October 9, 2011
Hot Stuff
I used to have a pair of oven mitts and potholders in the kitchen until one mitt and potholder reported to the RV for duty. I've been making do with the one glove/potholder system, but it's been affecting my relationship with the oven. Was this to blame for baking less cookies? Or broiling less cheese?
After I found some of Grandma's cute quilted gingham fabric, I knew I had to make myself a new pair of oven mitts and potholders. They remind me of Dorothy's dress in Wizard of Oz, which I didn't see until high school, but luckily did, thanks to my friend, Toto & family, who took pity on my sheltered cinematic life.
| Front and back sides of oven mitts and potholders stitched together. |
| Adding extra wide double-fold bias tape as trim to the mitts and potholders (to cover up the messy edges). |
Pinning trim to the edge of potholders.
All the edges of the mitts and potholders pinned.
| Ready for action! |
Wednesday, September 28, 2011
Craft Loft Transformation
I took over the loft area by slowly engulfing each foot of space with a computer station, yarn balls, and sewing projects. I was far too successful, too fast. The loft area is the first space you see when you walk upstairs and was used as a dumping ground. The drafting table doubled as my crafting table and office desk. This meant that everything went on top of the table: computer, printer, sewing machine, baskets, etc. or directly on the ground below it, mostly because there were no drawers. I had a lot of crafts organized in boxes, but everything was spread out. The bookshelf was in an inaccessible corner. I figured we could utilize the space better. I found a great crafting system on Craigslist (I love recycling and recycled prices) and this is what happened:
Before:
After:
Jeff installed 18 feet of counter and track lighting overhead that can be flipped on with a switch; no more turning off individual floor lamps! Everything has been organized in sections: office, sewing, cutting. The bookshelf is just to the right of the sofa, so you don't have to look past me to watch TV!
Laundry Room Organization
The laundry room was in need of some organization. It went from piles on the washer, dryer, and ground to this:
1. I bought baskets to sort and label: detergents, fabric care, and cleansers.
2. Then Jeff added a shelf for more baskets and to hold a jug of distilled water, so I can just pull the spigot forward to easily fill the iron or clothes steamer. Jeff also added a hook to hold an extension cord, in case I need it for the iron or steamer. Best of all, I moved the steamer from the master bath to its rightful place!
1. I bought baskets to sort and label: detergents, fabric care, and cleansers.
2. Then Jeff added a shelf for more baskets and to hold a jug of distilled water, so I can just pull the spigot forward to easily fill the iron or clothes steamer. Jeff also added a hook to hold an extension cord, in case I need it for the iron or steamer. Best of all, I moved the steamer from the master bath to its rightful place!
Tuesday, September 27, 2011
Sleeping Bag Stuff Sack
Ryan just went on his first ever Boy Scouts camping trip and
I made him a stuck sack to carry his sleeping bag.
It took less than an hour since I wasn't concerned with exact measurements.
Here's what I did:
1. I pulled a sample to gauge measurements and cut the fabric by eyeballing it.
You will need one super long piece for the main body and a circular piece for the bottom.
2. I sewed the circular piece to the bottom edge of the main body piece, then I sewed the edges of the main body piece together except for the last 2".
3. I folded the top 2" in half and sewed a 1" drawstring casing.
4. I flipped the bag right-side out, and painted Ryan's name using Martha Stewart stencils.
5. I placed a scrap fabric over the paint and ironed for 30 seconds until dry.
Then, I took Ryan's sleeping bag...
and threw it in the stuff sack.
Ryan was one happy camper!
Subscribe to:
Posts (Atom)